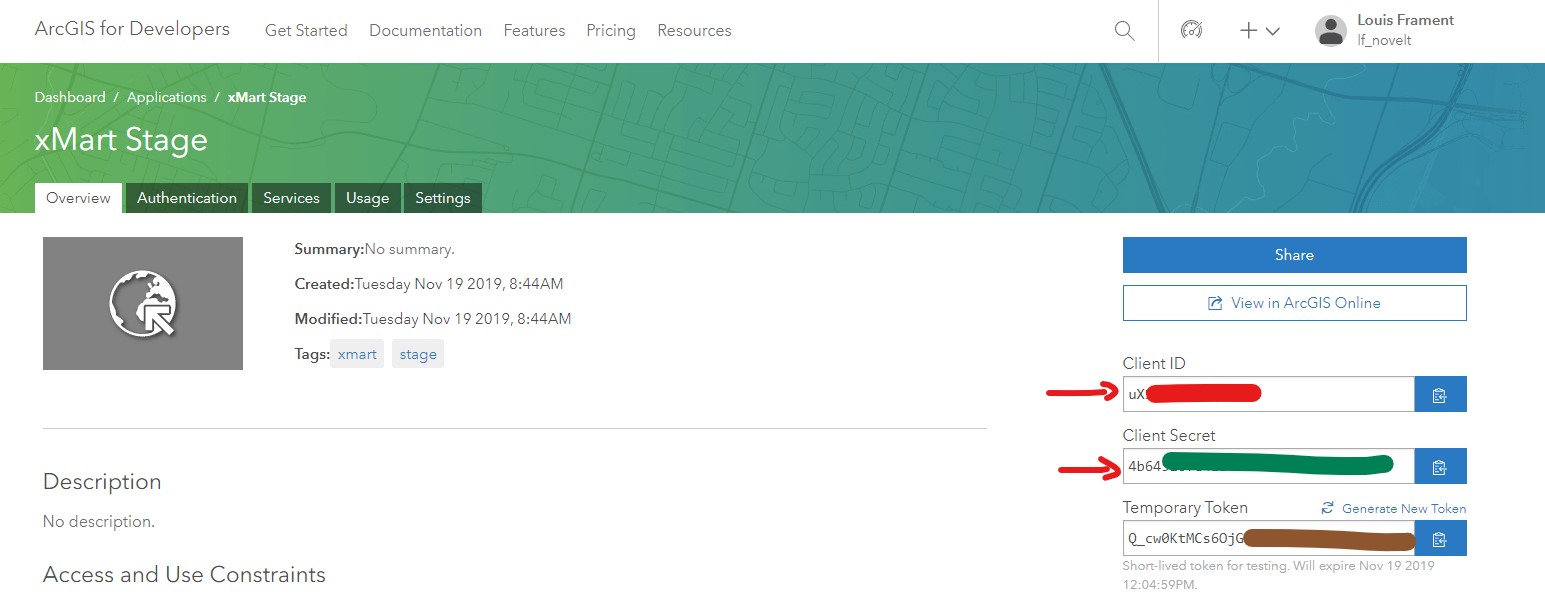
Step 1: Arcgis registration
Create an Arcgis develop account https://developers.arcgis.com/sign-in?redirect_uri=%2Fapplications%2Fnew
and register a new application https://developers.arcgis.com/applications/new
Copy the ClientID and Client Secret from the newly created application page
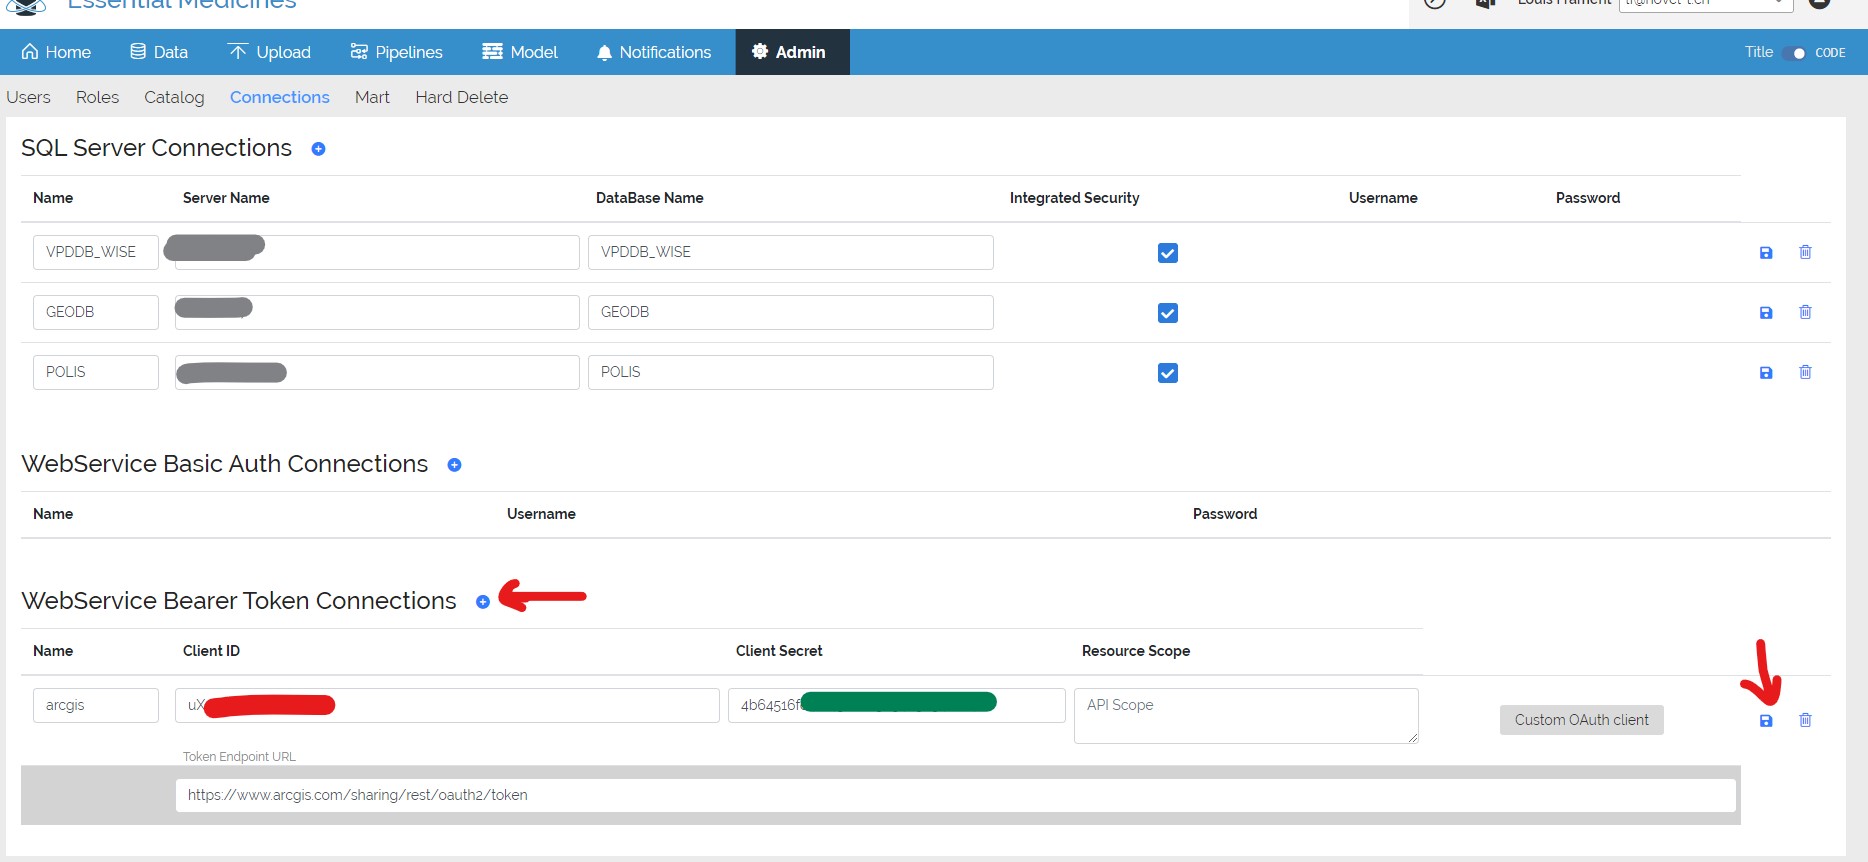
Step 2: Create xMart Connection
Go to your mart Admin > Connections https://extranet.who.int/xmart4/YOUR_MART/admin/connections
Beside Webservice Bearer Token Connections, click the + button
Set Name arcgis
Fill in Client ID and Client Secret from above.
Click Current Azure AD button to set a custom Oauth client As Token Endpoint URL, set https://www.arcgis.com/sharing/rest/oauth2/token
Click the Save icon.
Step 3: Edit xMart pipeline
Create or edit your pipeline https://extranet.who.int/xmart4/YOUR_MART/pipelines/PIPELINE_CODE
In the Extract section, insert this command
<GetWebService Url="https://geocode.arcgis.com/arcgis/rest/services/World/GeocodeServer/findAddressCandidates?f=json&singleLine=4730 Crystal Springs Dr, Los Angeles, CA 90027&outFields=Match_addr,Addr_typ" ConnectionName="arcgis" TableName="data">
<GetJson>
<Path>$.candidates</Path>
</GetJson>
</GetWebService>
You can replace the Url and the Path element by the actual API endpoint to be called.
This Url demoed here is the first example from Useful resources.
In the Url attribute, the & characters should be xml-escaped by using & instead, else a parse error like '=' is an unexpected token. The expected token is ';' will be thrown.
Finish your pipeline by loading stage table data in your target table using the regular <Load SourceTable="data" TargetTable="...">.
You’re done!
Useful resources
Arcgis tutorials
https://developers.arcgis.com/labs/browse/?topic=any&product=rest-api
Search for an address
https://developers.arcgis.com/labs/rest/search-for-an-address/
GetWebService command
https://extranet.who.int/xmart4/pipeline-script-guide#GetWebService