With the SubForm feature, a user may edit a table within a form. In order to do this new tool, the model needs to have the a master table linked to a child table.
Example data
For this example, we are going to create a shopping backet to which the user can add items. We will be using the following model
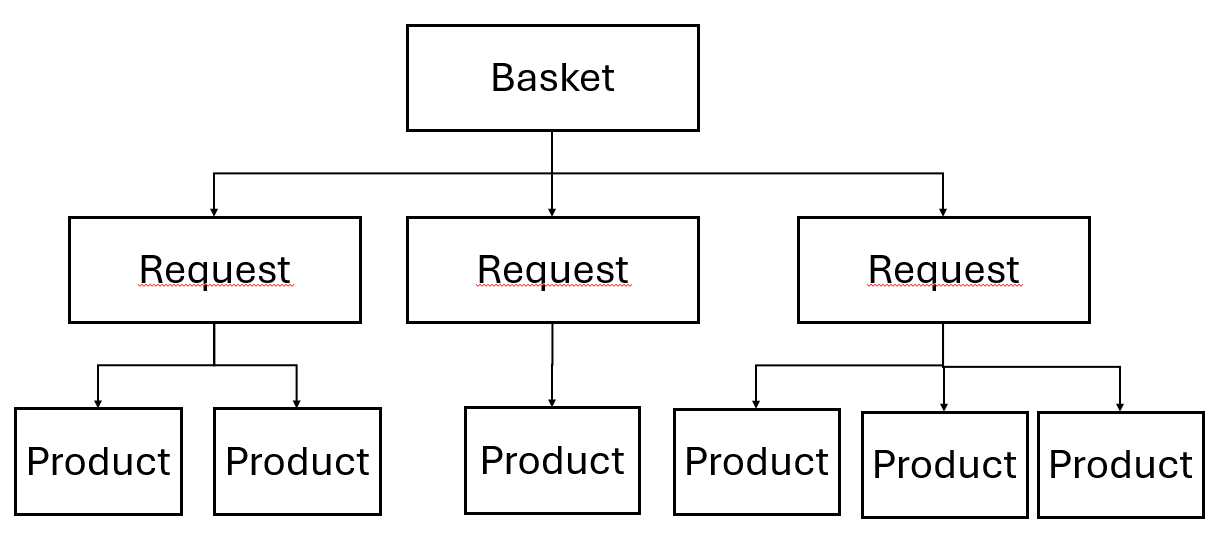
In this model, there is a basket which is can contain one or more items. These items are selected from a reference table.
The tables are set up like this.
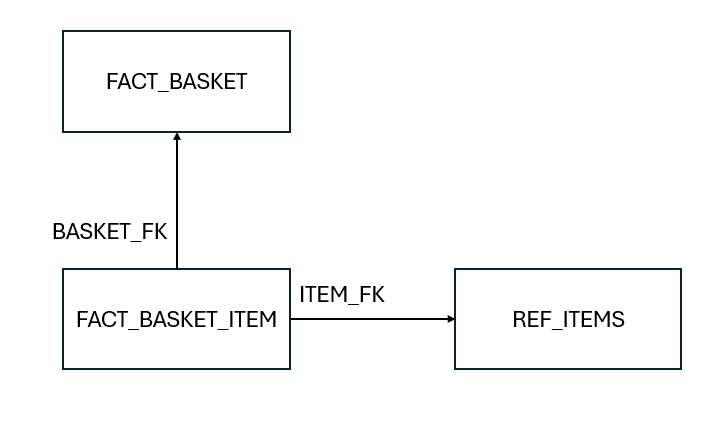
There is a Basket table called FACT_BASKET, an Items table called REF_ITEMS and a Basket Items table called FACT_BASKET_ITEMS which has Foreign Keys to the Basket table and the Items table.
Using a subform
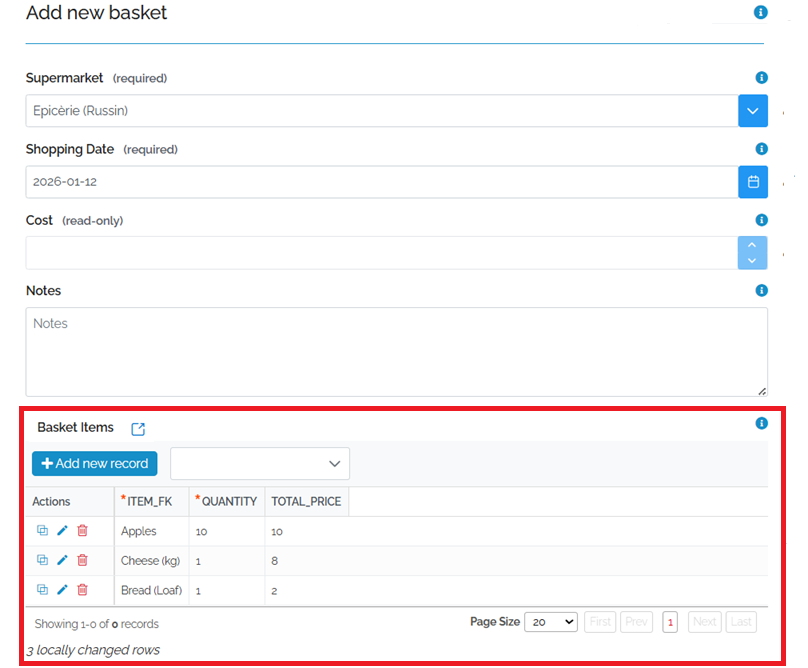
A subform appears as a grid as part of the main form. In this case, the Basket is the main form and the Basket Items are the subform. This is because we want to attach many items to a Basket.
When you go into the main form, it appears at the bottom
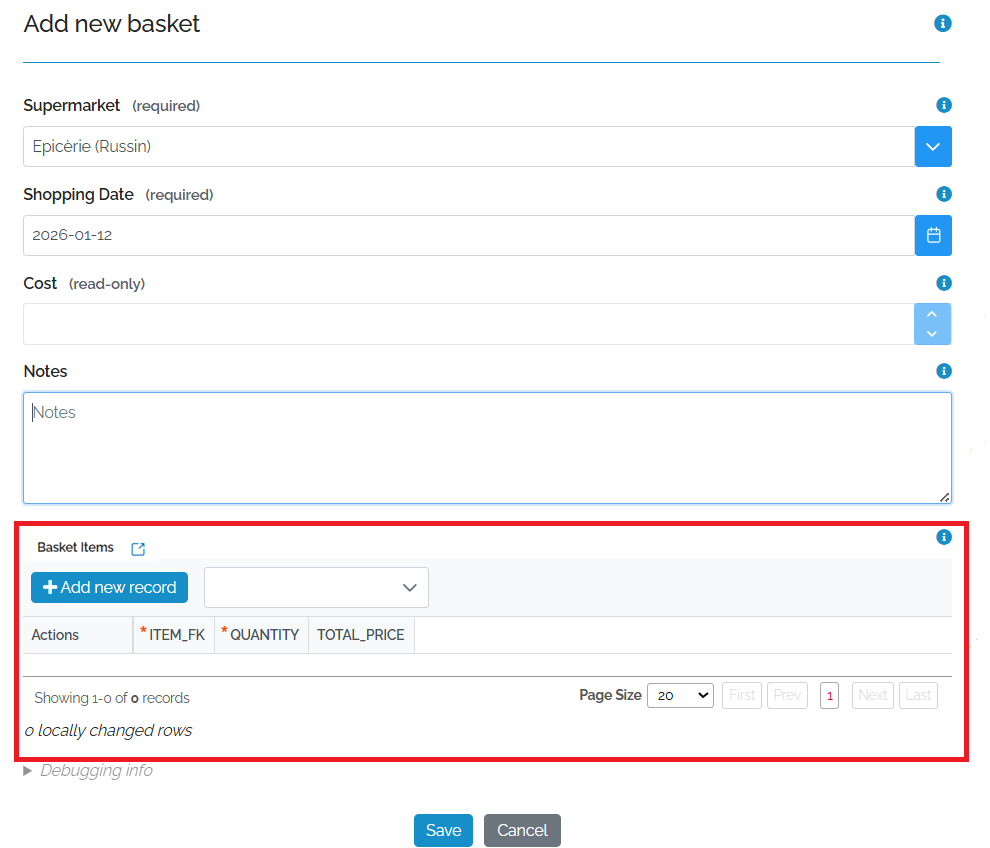
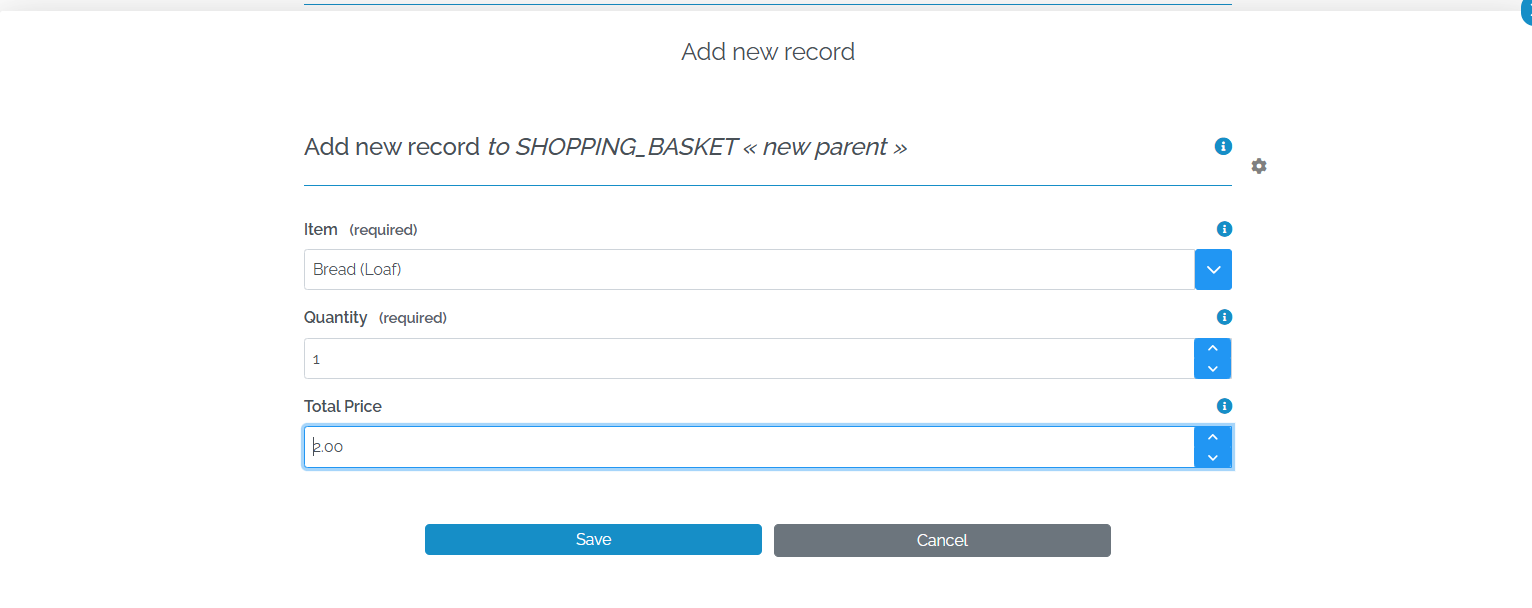
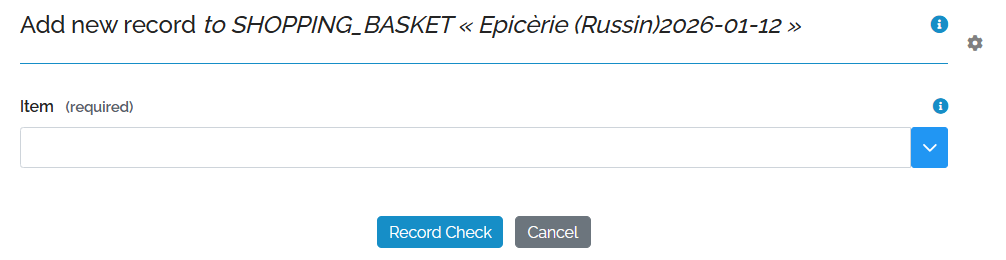
To add a new item to the basket, click Add New Record. This opens a pop_up
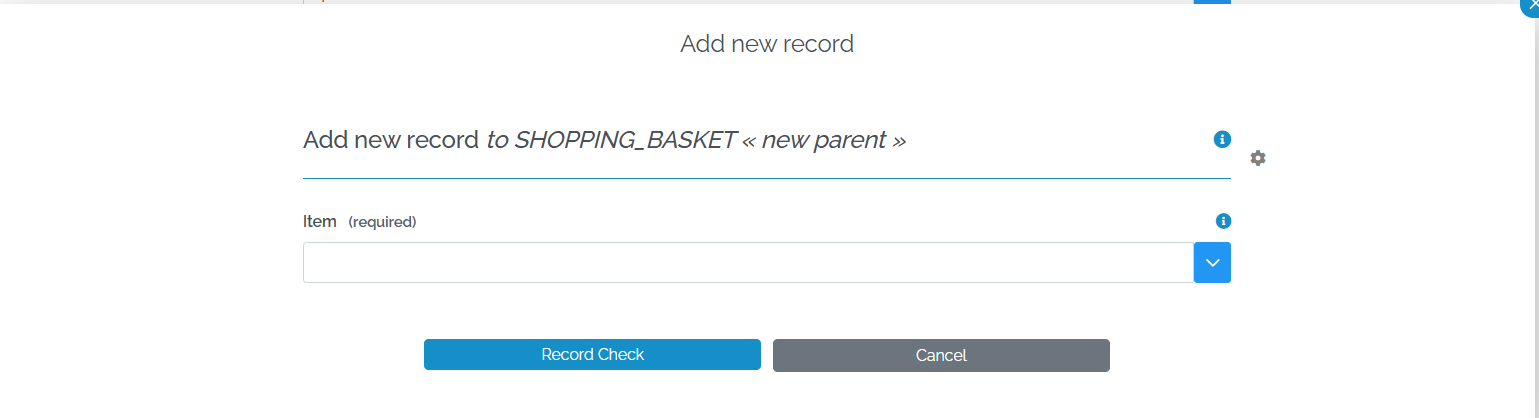
Fill in the fields and press Save
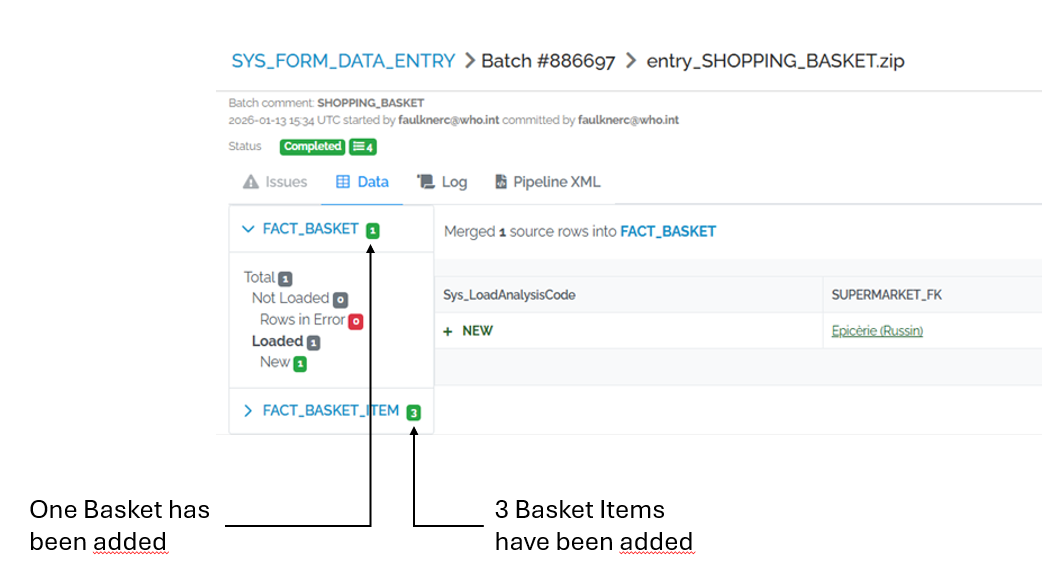
The item appears in the subform of the main form. Note that underneath the red box, there is a count of how many items are in the subform.

On the left of the existing records is the Subforms Action Panel

If you select View Record then the record will be opened but you will not be able to edit it.
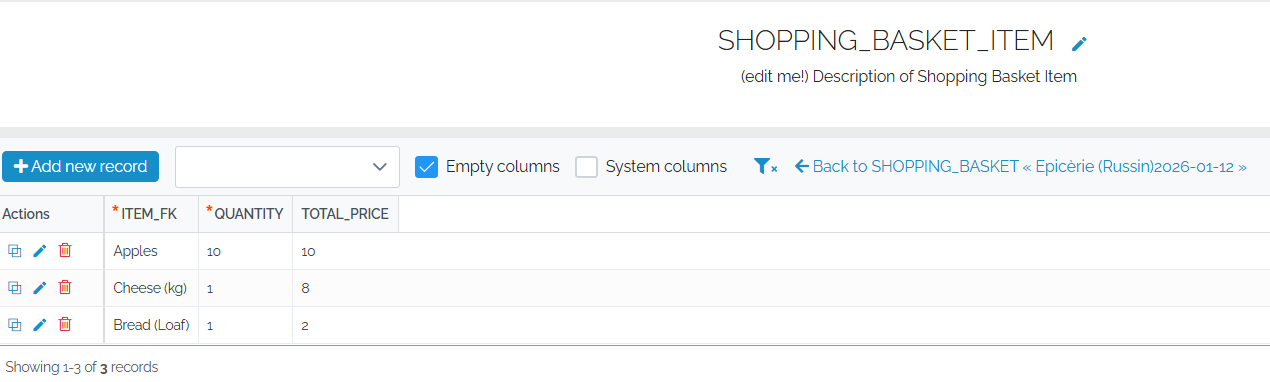
As you add more rows, they are added to the list
Now you can Save or Cancel the data edits
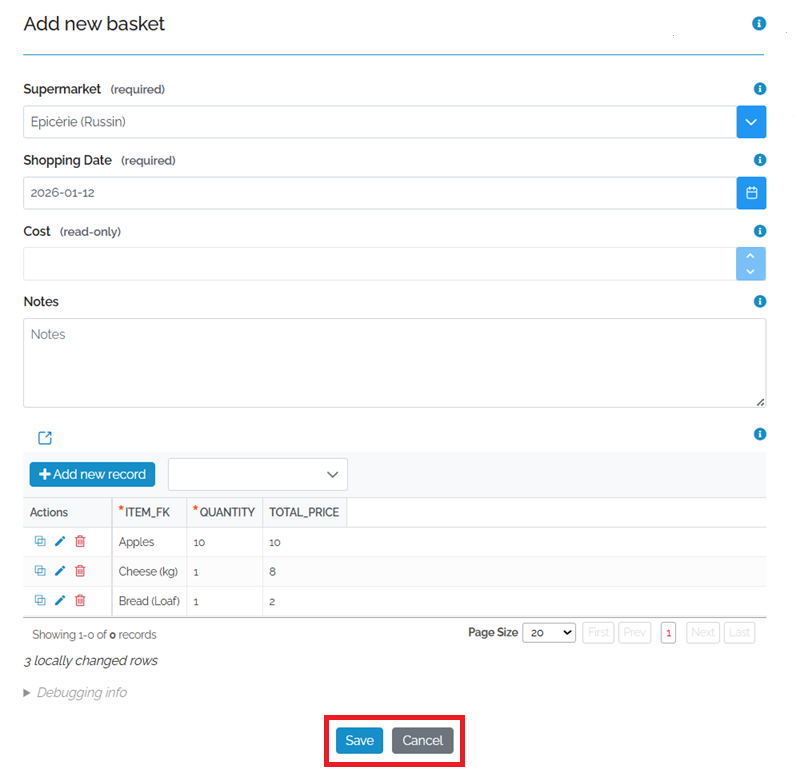
Once you press save, the data is committed using a standard batch. Any changes made to either the subforn or the form are included
On the Form grid, the subform items appear in a column to the right. You can either View or Add the data. If the column appears without a title then you will need to add a label to the subform
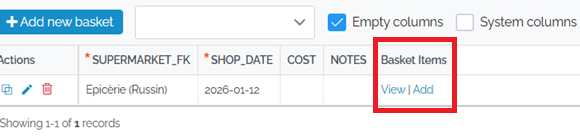
Clicking View will bring you to the subforms data page
Clicking Add will show you the subform with the relevant fields
Creating SubForms via the user interface
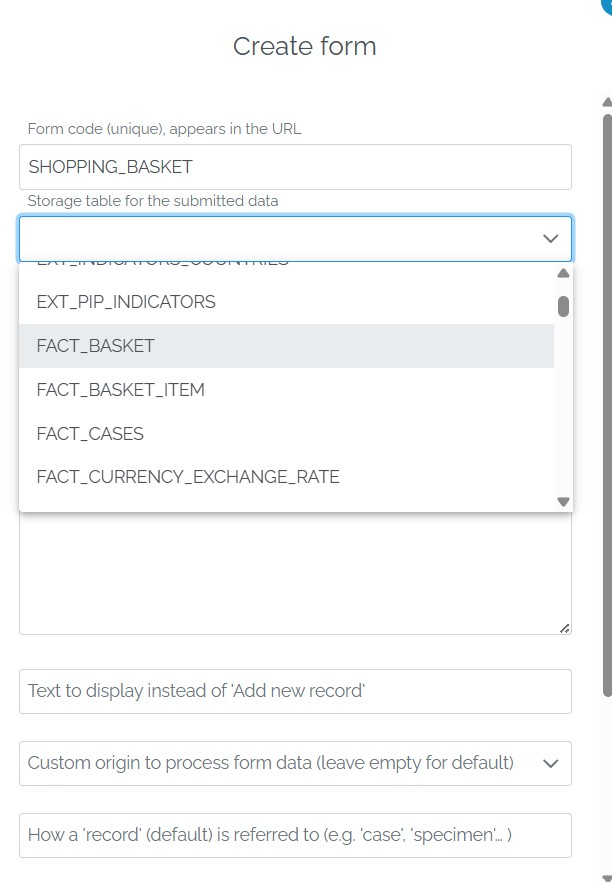
The easiest way to create a form with a Subform is by going to the Forms page and clicking on the Create Form button

Enter the form code, select a table and fill out the other details.
Then scroll to the bottom and press Generate Form
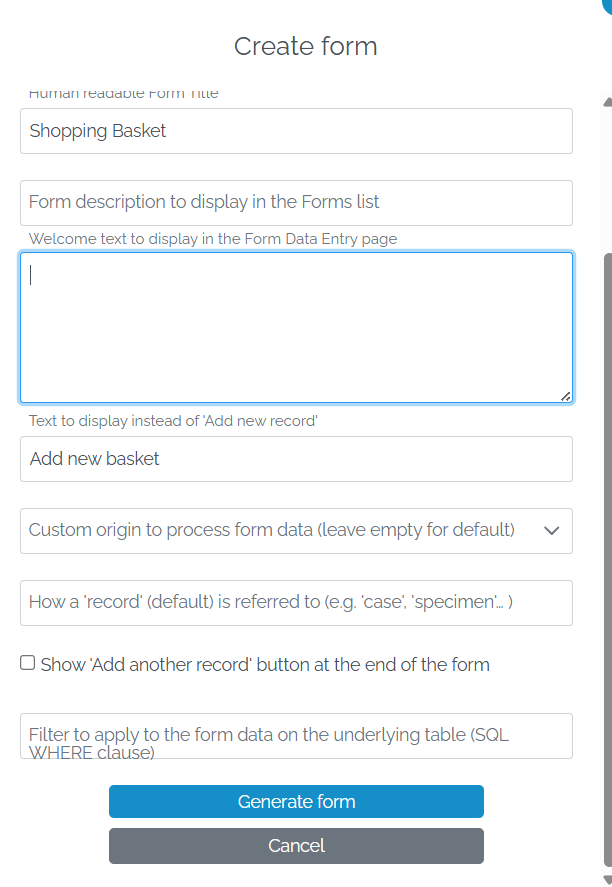
This willl create the form and open it.
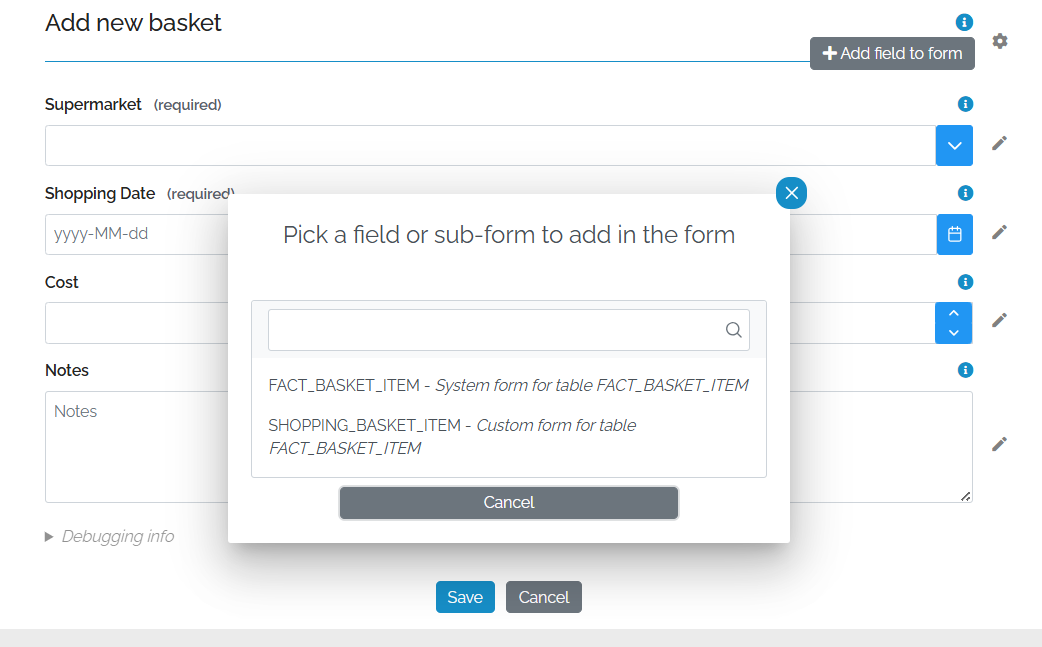
At the top right, there is a button marked Add Field to Form
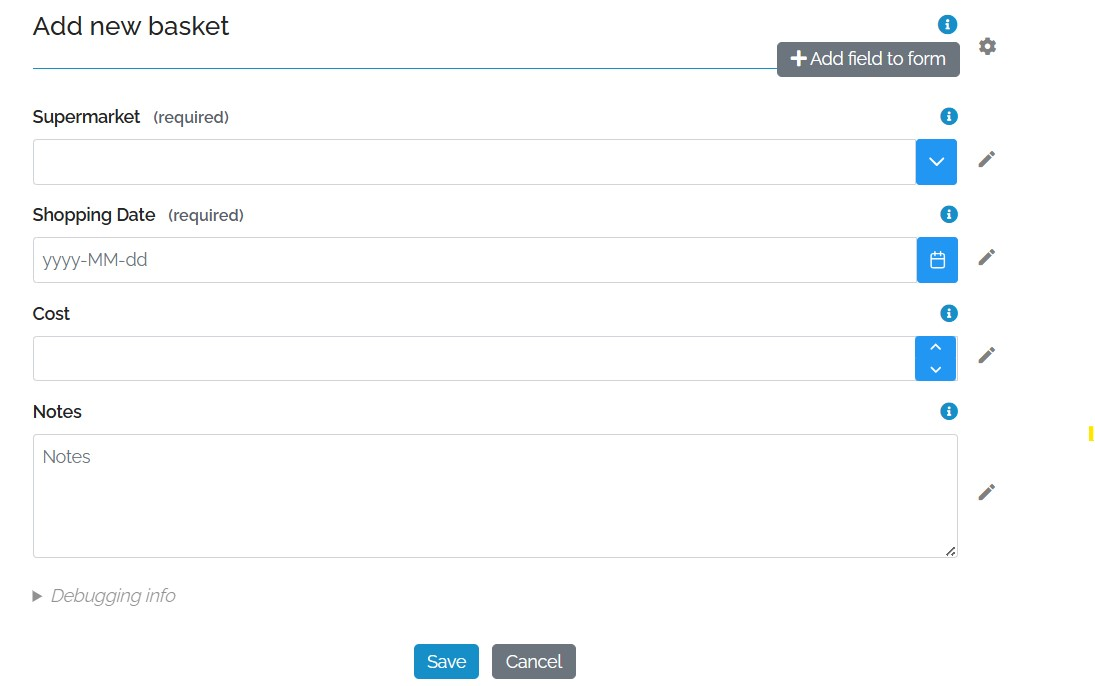
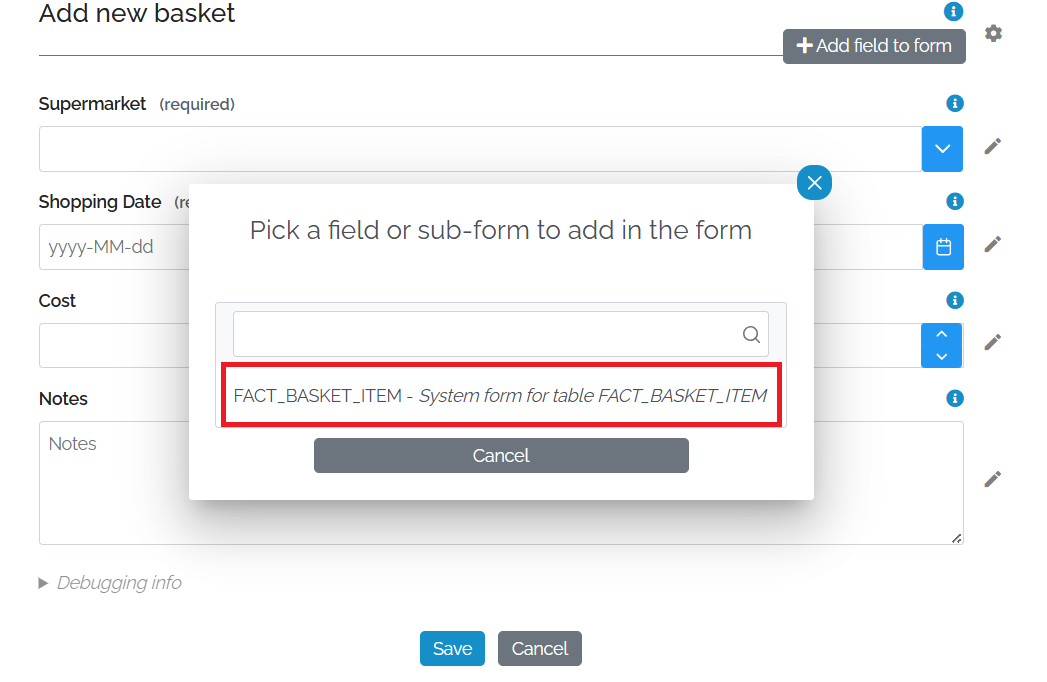
If you click on it, it will produce a pop-up with a list of fields which can be added.
Notice that the field which is available is a subform to the Basket Item table
If you click on it, you go to the Add Field panel appears on the right of the screen.
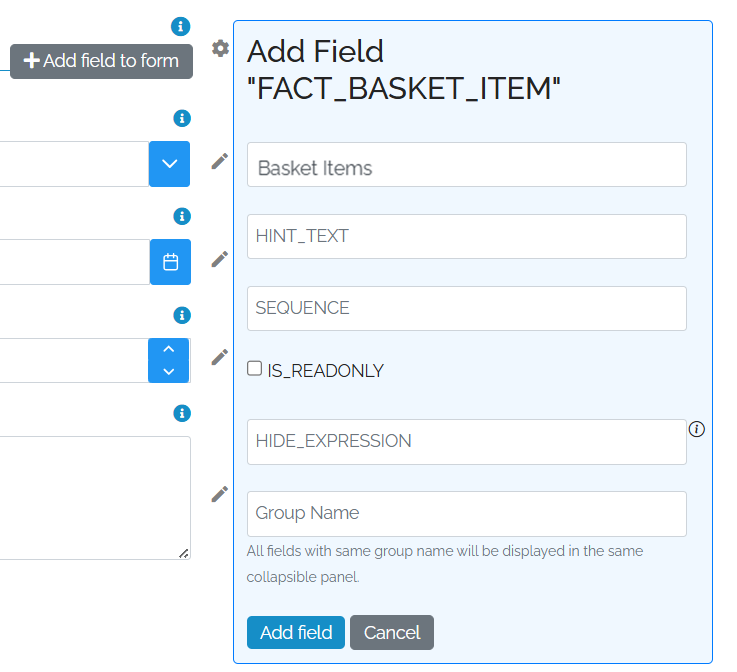
Here you can add a label, hint, sequence, hide expression, group name.
When you press the Add Field button, the subform appears.

Creating SubForms using files
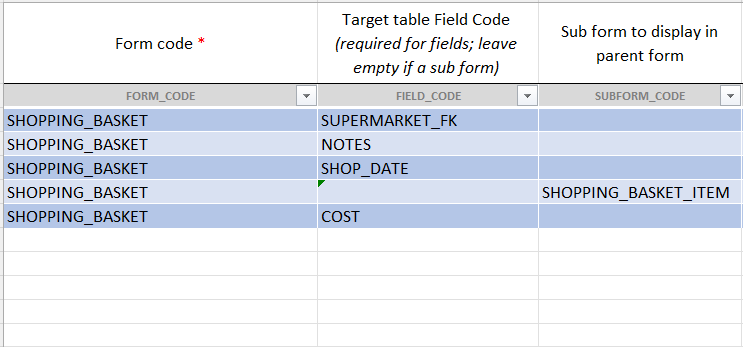
You can create a Form using the standard method. from there, you can add a field into the subform with just the table name
So the forms tab contains the main form

And the fields tab contains the fields for the main form and one subform which is a table name.

Customising SubForms
Another way to add a subform is to use an existing form. To do this, you create a custom form
In this case, I have added a form called Shopping Basket Item

Nowe if we go to the main form we can see that there are 2 options to add a form, the System form or the Custom form
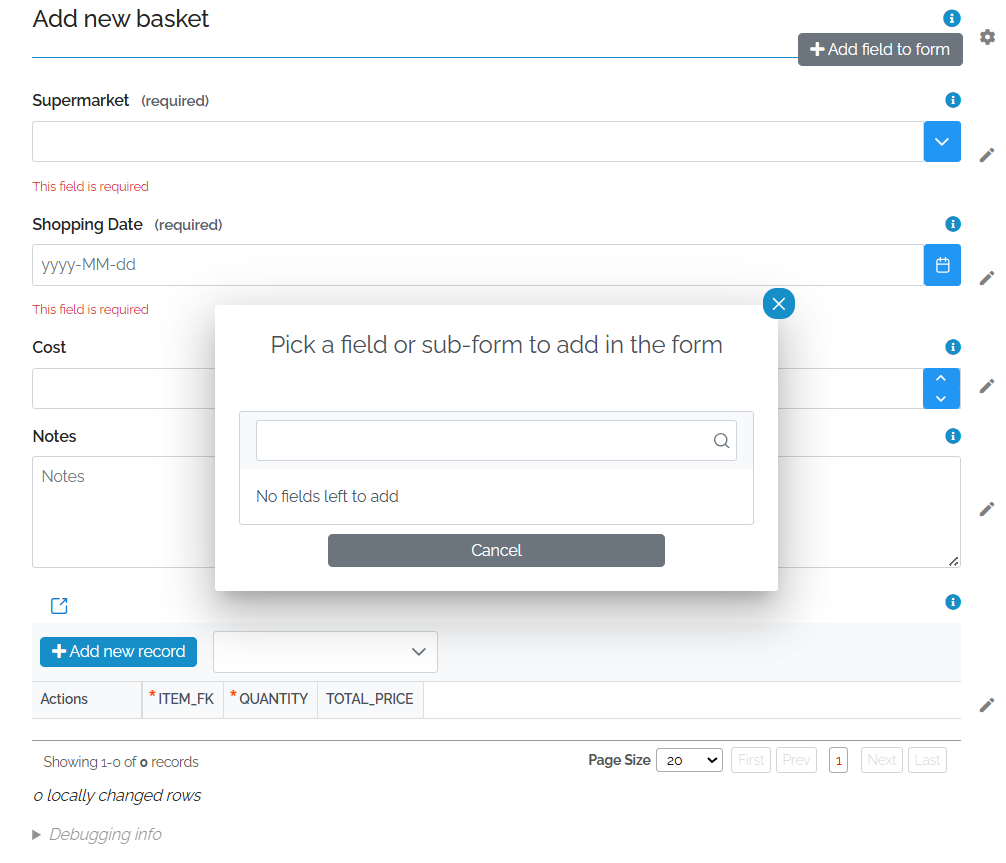
Note that as soon as a subform to the referenced table is added, you cannot add another one.
To switch form, you will need to delete the old subform and add the new one.
To add the subform in Excel, simply add its name in the subform column of the main form. You do not need to export the custom subform as well.