There are two ways to add new users; one is from the Users page and the other from the roles page.
Types of Users
The following kinds of users can be added to a role:
| User type | Info Needed | Description | Example |
|---|---|---|---|
| Individual User | A person with an email address. | person@email.com | |
| Team | org path | A team with an org path. | /WHO/* |
| Client Application | Client ID | Only applies to the data API. The data API is available to an external client application. | bb4bfe5b-92a5-4246-a78d-318e5264bc5b |
Add and Edit Individual Users from Users Page
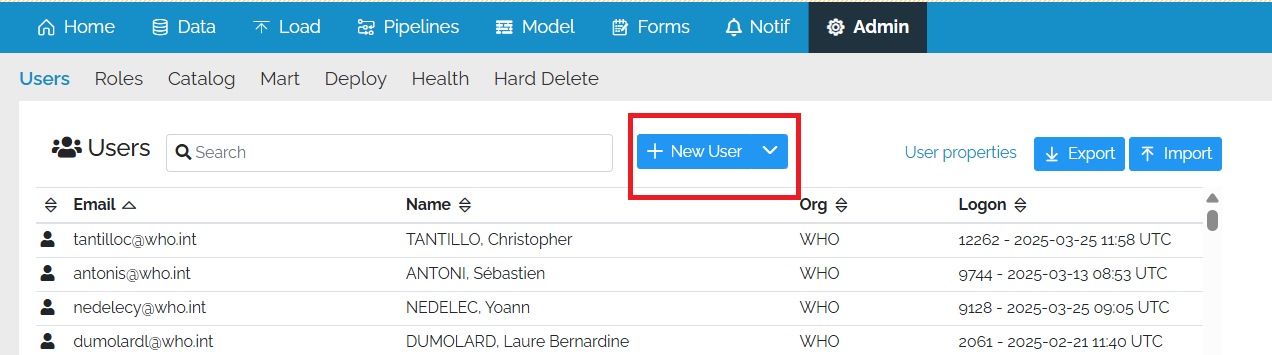
Go to the Users tab in Admin

Add individual user from the Users Page
Pressing the + on the New User button.
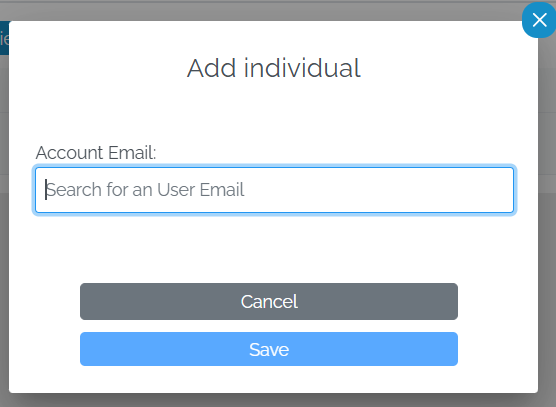
This will bring up a pop-up allowing an individual to be added
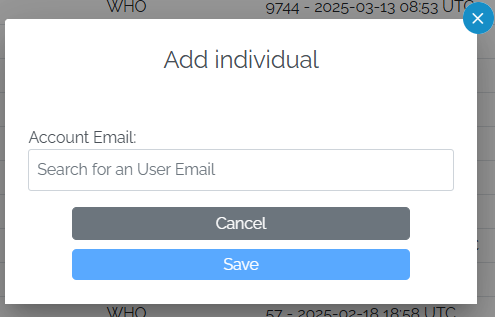
Add Individual User Email Address
Enter a user email into the Account Email box. As you start to type, a list of users will appear underneath the box.
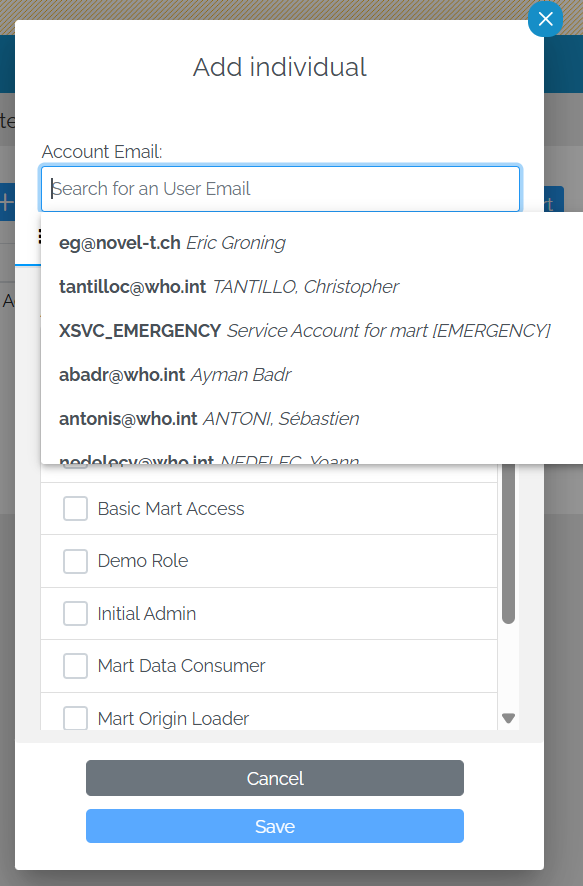
The list filters depending on the letters entered until the user is found.
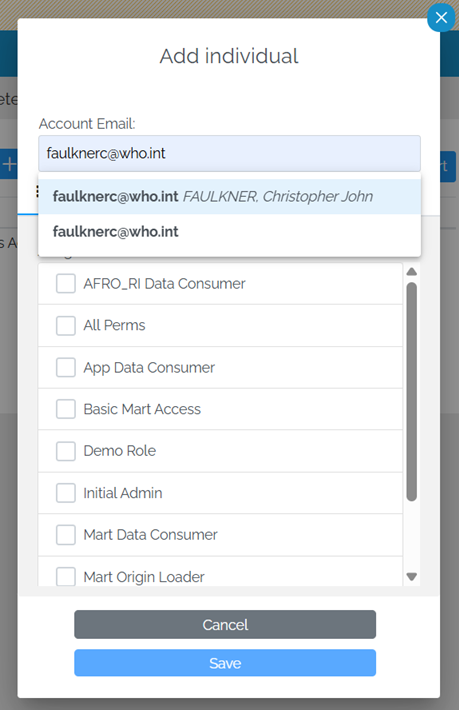
Assign Individual User to Roles
Once you have added the user, you can select the roles by checking the boxes next to the role names. The user must be added to at least one role.
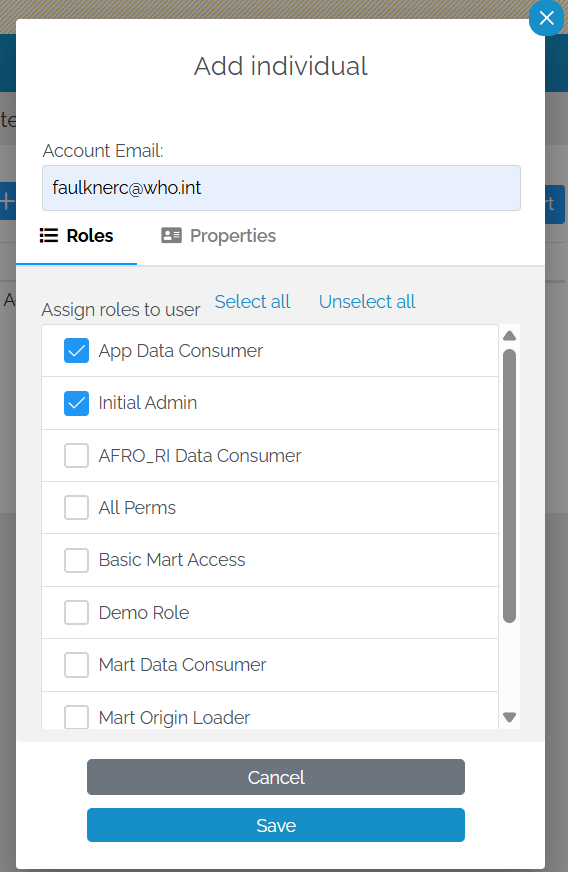
As the roles are selected, they are moved to the top.
Assign Property Values to Individual Users
Clicking on the “Properties” tab will allow you to assign property values to the user.

Save Changes
Once you are happy with the changes, click Save. To abandon all changes, click Cancel
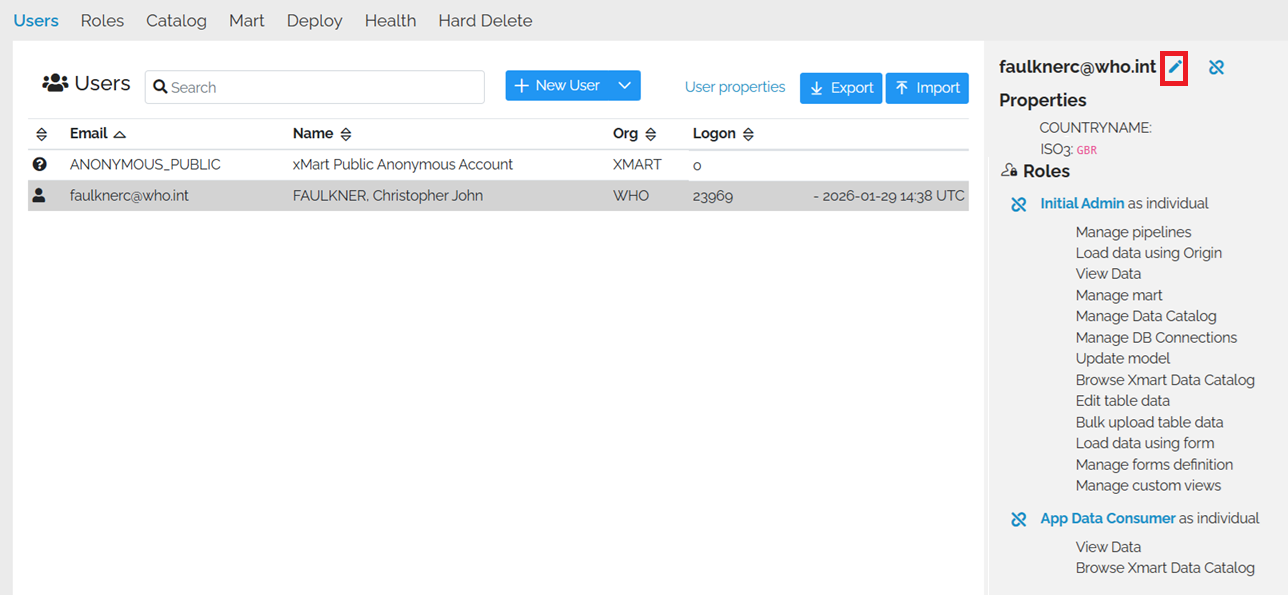
Edit Individual User
To edit an individual user, go to the users list and select the user. The roles and property values will appear on the right. Click on the pencil icon and then follow the same steps as above to change user Roles and Properties
New User Menu
The New User button has a menu which can be dropped down by clicking on the down arrow to the right.
It has these options

Add Team
In xMart, it is possible to add a team of people. So if, for example, you wanted to add everyone in the WHO to your mart, you would click on “Add Team” which would bring up the “Add Team” pop-up. Type the OrgPath (e.g. WHO) into the “Team Org Path” text box and then press Enter. “/*” may be added to the end of the team to indicate that all sub-teams are also included.
The team needs to be allocated to one or more roles as before.
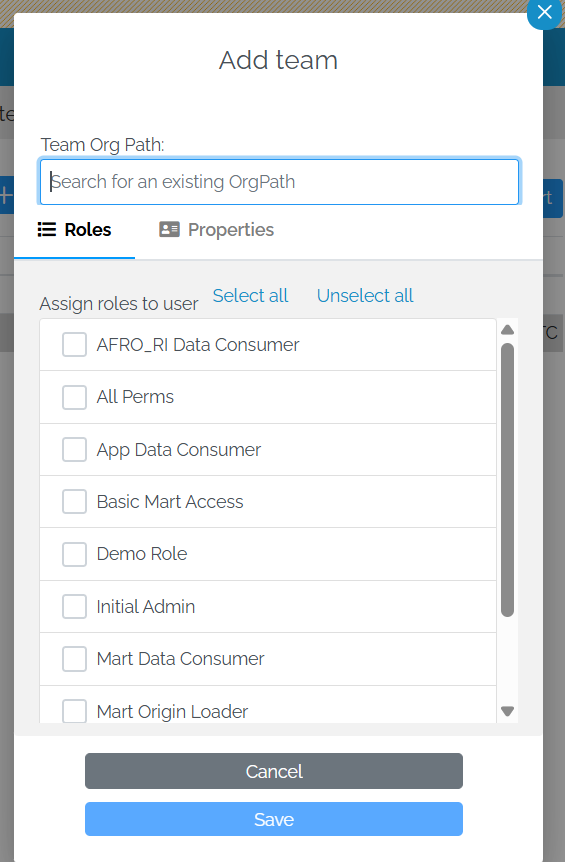
As before, clicking on the properties tab enables values to be added to the properties.
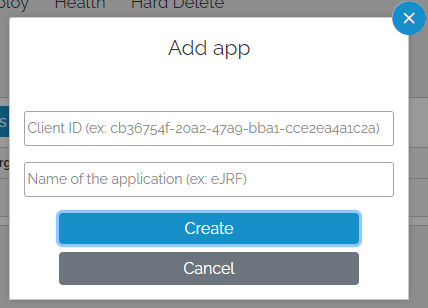
Add Client Application
In order to access private (i.e. non-public) data, the external users needs to register a client application. This then needs to be registerd as a user in your mart. To do this, click on “Add Client Application” which would bring up the “Add App” pop-up.
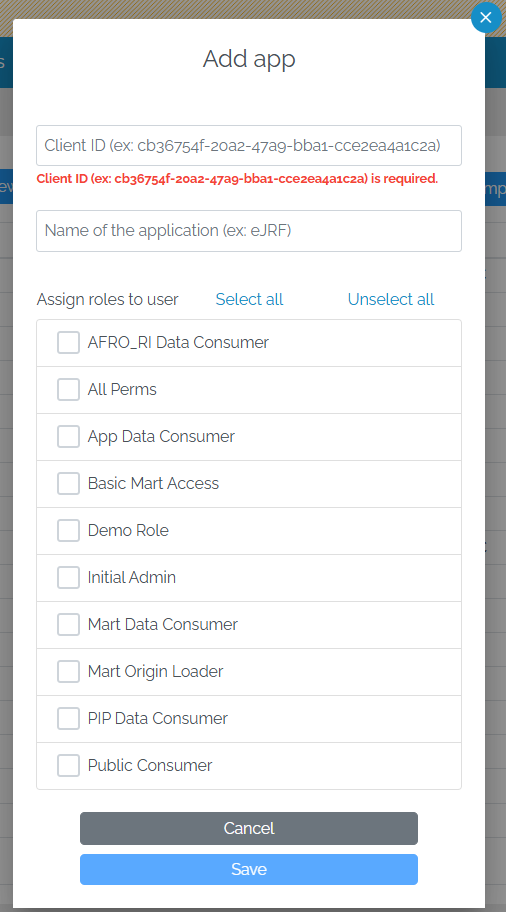
Enter the Client ID of the app in the Client ID box and the name of the application underneath it.
The app needs to be allocated to one or more roles as before. Clicking on the properties tab enables values to be added to the properties.
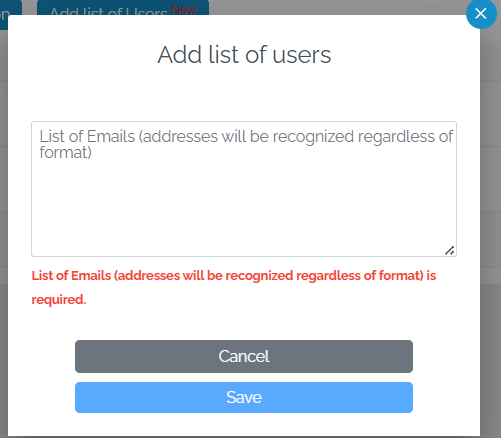
Add List of Users
You can add a delimited list of users using the “Add List of Users” menu option.
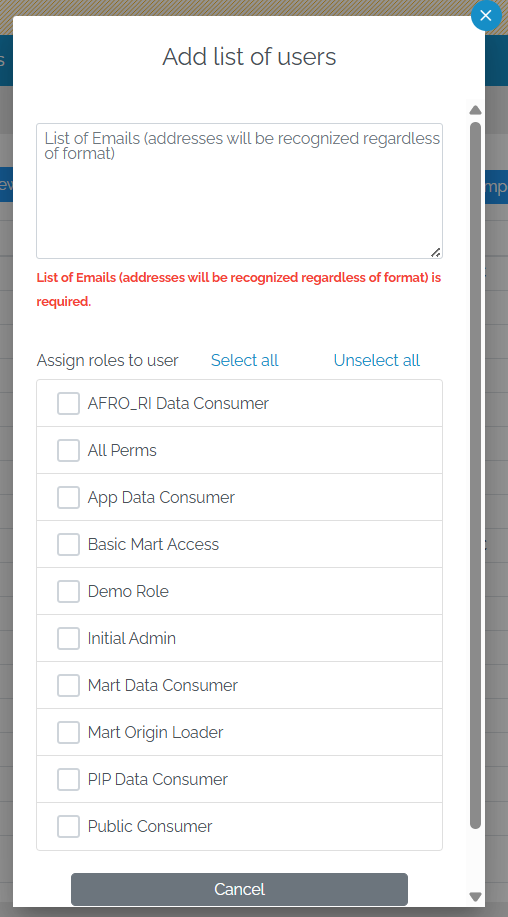
The user list can be in any delimited format.
The users need to be allocated to one or more roles as before. Clicking on the properties tab enables values to be added to the properties.
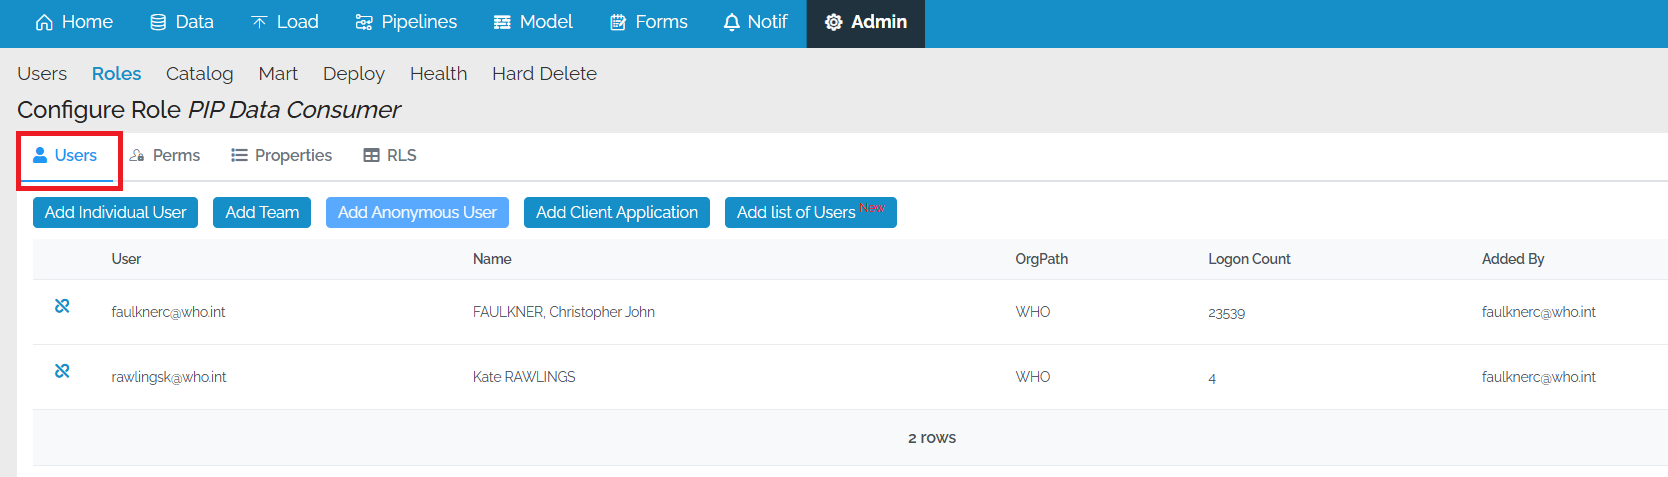
Add Users from Roles Page
In order to manage the roles, navigate to the roles page from the Admin menu option
Go to the Roles tab in Admin

Users can be added to individual roles. First, the roles need to be created.
Once they have been created, select the roles page and press Configure against the role to which you wish to add the users.

Select the Users tab
Add Individual User
Select Add Individual user and enter their email. The name of the person will be obtained from the account provider system when they login.
Add Team
Select Add Team and enter the absolute org path of the team.

Type the OrgPath (e.g. WHO) into the “Team Org Path” text box and then press Enter. “/*” may be added to the end of the team to indicate that all sub-teams are also included.
Add Anonymous User
The Add Anonymous User button is no longer functional. To make tables available to the public via the OData API, add read permission in the Public/Anonymous API Consumer role.
Add Client Application
Select Add Client Application and enter the Client ID of the application as well as a human-readable name (so you know what the application is later).
Just adding the Client ID in this manner is not sufficient to grant rights to an external application. It is necessary to register the client application.
Add List of Users
You can add a delimited list of users using the “Add List of Users” menu option.
The user list can be in any delimited format.